shabooya
blog
others
yell it!
shabooya
hm, i need a lot of $$$
add my MSN : neonpartymonster@live.com or my fb : SHABINA FARIZA thankiesssss

29.3.09 @ 6:56 AM
in love
The Swacket
AAAAH I WOOF THIS COAT/JACKET/HOODIE/PONCHO (you named it). Yes, you can wear The Swacket in multiple ways. To cool to be true.
price : $445.00
check out the website for more
23.3.09 @ 10:44 PM
role model
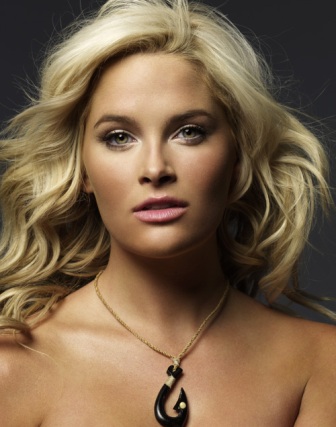


WHITNEY THOMPSON, my role model.
She is Whitney Thompson from America's Next Top Model. Kalo diliat badannya, pasti beda banget sama model-model high fashion yang kurus tanpa daging. But believe or not, ternyata Whitney- lah yang menang di cycle 10 ini! Dia pede aja ikut kontes ini yang isinya cewek-cewek kurus yang mungkin badannya emang jauh lebih kecil daripada dia. Pahanya, dadanya, sama pinggulnya yang berisi, malah bikin dia jadi "beda" dibandingin sama Anya&Fatima yang kurus-kurus. Gue jadi bangga dan bersyukur sama badan gue yang cukup curvy, cukup berisi, dan proposional. Gak perlu kurus banget kan kalo mau jadi model?
”I have breasts and I have hips and I have a butt and I am so proud of those things. I am here, I am me…I’m not going to change myself.” (Whitney – Episode One)
14.3.09 @ 9:13 PM
March
Hi all!
Ah, too much to buy in this month.
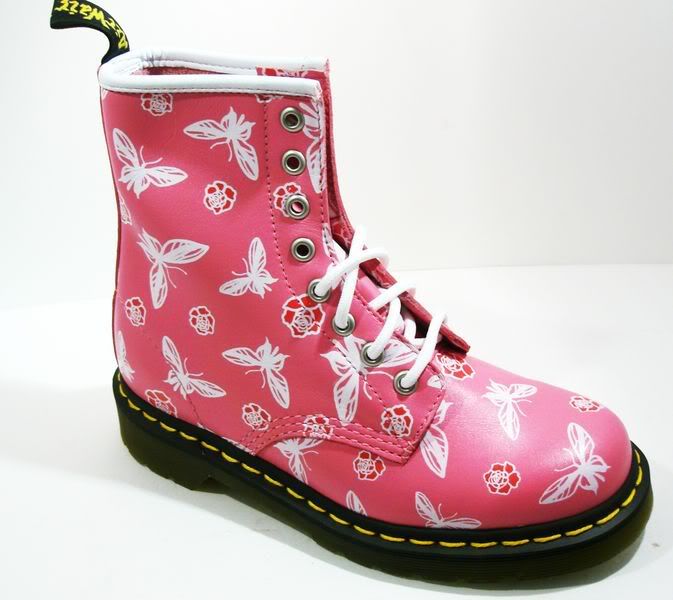
THE MOST IMPORTANT THINGS TO BUY!!!!!!!
1. Boots (Doc Martens or Zara)
2. Leather Jacket (Zara or Topshop or Forever21)
3. Black legging & Tights
1. Boots (Doc Martens or Zara)
2. Leather Jacket (Zara or Topshop or Forever21)
3. Black legging & Tights
13.3.09 @ 7:25 PM
Current Buy list :)
 Black patent boots
 New school bag
 LEATHER JACKET!!!! NO MATTER WHAT, I NEED IT NOW!!
Leopard Wallet

High Heels ;)
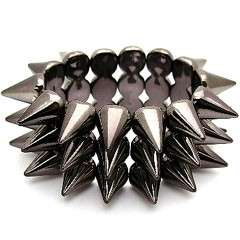 Silver Metal Cuff
 A LOT of bangles, and a dream catcher necklace
 Neverrrr enough for Fringe boots :)
 Buckle Boots, but in black color
 Acid washed denim!!
@ 7:19 PM
TOPSHOP Collection Sport Nouveau


Sportswear goes glamorous with graphic jersey prints and billowing shapes for SS09. Cropped tees and oversized silk jersey vests are teamed with Aztec print leggings, snow washed jeans and sporty, zip detailed mini skirts. Silk harem pants and billowing all-in-ones are given a futuristic urban feel with sharp tailoring while clean line space-age looking platforms, gold hardware and an 80's looking palette finish off the Sport Nouveau look.
MY FAV :


MY FAV :
10.3.09 @ 7:33 AM
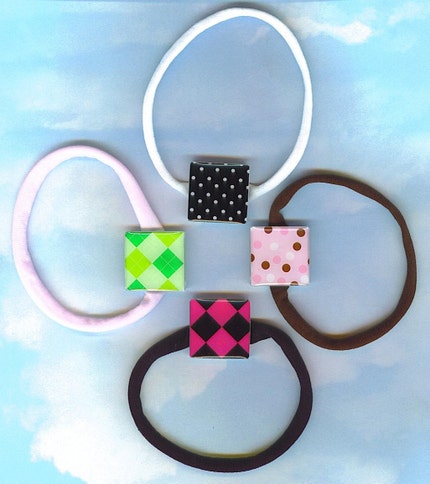
i hate braided headband, i love ribbon headband

Use Ribbons!
Play up an updo with a modern take on the headband!
How to get the look:1. Brush hair into a high ponytail, then secure it with an elastic.
2. Wrap the tail around the base and pin it securely.
3. Mist all of your hair with hairspray.
4. Wrap three black ribbons ($1 per yard at most fabric stores) around your head, spacing them an inch apart.
5. Tie all into one bow at the nape of your neck, and voilà — instantly chic!Let's make a ribbon headband!
Materials:
2 elastic pony-tail holders
36 inches Ribbon (or longer)
Fray Check
Step 1: Cut at least one yard of ribbon and put fray check (or clear nail polish) on the cut ends so the ribbon doesn't fray.
Step 2: Interlace the two pony-tail holders as shown in the pictures. Then measure the pony-tail holders from end to end by stretching lightly. You don't want to stretch them tight or the headband will be too tight and pull back off the head. Mine had a stretch of 4 inches.


Step3: Now for some math. Yikes! Measure around your head or your daughter's head to find the overall measurement. Subtract the pony-tail stretch measurement from that. This gives you the total amount of ribbon you need to go around your head. Half this measurement. This is your total. (For my head the half measurement was 9 inches, for my younger daughters it was 7.5 inches) Fold ribbon in half and place the fold at the end of a yard stick. Measure the total measurement from the fold and mark with a pin on each strand of ribbon.
Step 4: Thread the left end of the ribbon through the pony-tail holder as shown. Pull until you get to the pin.


Step 6: Thread the right end of the ribbon through the other pony-tail holder as shown, pull until you get to the pin, and follow step 5 again.

That's it! Your headband should look like this.

The extra ribbon is for ties. You can make the ties as long as you want but make sure they are at least 9 inches long for a good tie.

(from http://chocolateonmycranium.blogspot.com)
and you can try this one too
How To Make An Inexpensive Ribbon Headband
 How To Make An Inexpensive Ribbon Headband: In a world where fashion is so mass-produced, it can be hard sometimes to find a unique wardrobe. One of the best ways to add some originality to your look is to create it yourself. So follow VideoJug's guide and learn how to make an inexpensive ribbon headband.

-
You will need
- 16 - 25 inches ribbon
- 4 - 5 inches of 1/4 inch or wider sewing elastic
- antfray solution
- needle and thread
- measuring tape
- scissors
- Step 1:
-
Head Measure
- In order to cut the right length of ribbon, measure your head with a measuring tape where the headband will be positioned. Cut the ribbon two inches less than this measurement.
- Step 2:
-
Stop The Fray
- Once you cut the ribbon to the correct size, dab some anti fray solution onto the ends of the ribbon so it doesn't fray. You can find anti fray solution at a sewing store or in the glue section of a craft store.
- Step 3:
-
Make It Stretch
- After you've let the anti fray solution dry on either end of the ribbon, connect one end of the ribbon with an end of the elastic. With a needle and thread, make several stitches back and forth through the ribbon. If you're not great with a needle and thread, ask a relative or a tailor to do it for you. It would take them just a couple minutes and will probably do it gratis. Before doing the same to the other side, check the fit. If it's not snug on your head, trim the ribbon and/or the elastic to make it a little tighter. Then repeat this step for the other side of the ribbon.
@ 7:23 AM
cute!


5.3.09 @ 1:36 AM
ebay-ing around


linkss
Dilla
Eci
Bunga
my cobrasnake
Betet the photographer
let's blogroll-ing
R&G
Street Peeper
NYLON
Camiller
superfantasticpicturetime
VICE
me&you
dark-substances (COOL ALERT!)
Credits
you can remove this if you don't have a conscience. i assure you i will not hunt you down.
skin by: Jane
edited by : shabina fariza
resources: 1 2